Showing posts with label recipe. Show all posts

Sunday, 6 December 2015

Gløgg glögg glugg

We need to talk about mulled wine. 'tis the season and it's everywhere. Unfortunately it's usually bought in a supermarket and tipped into a pan, sickly sweet with a vague hint of cinnamon.
I just had a cup at a rainy Christmas market and it was horrible. It's no wonder so many people don't like it if this is all they've ever tasted.
But it doesn't have to be this way. People who don't think they like mulled wine like my gløgg because it's properly spiced, not overly sweet and actually tastes good.


First, spice. A stick of cinnamon will not flavour anything in the ten minutes it takes to heat up the bottle. The key is lots of spices and time for the flavours to infuse.


Once you have heated the wine, along with an orange cut into quarters, keep it on the heat (not boiling) for about 15 minutes then take off the heat and leave to infuse for at least an hour.
Next, sweetness. Too much sugar and the wine is unbearable, too little and it's bitter to the taste. My advice is to see what works for you. I think my recipe is the perfect balance but your tastes may differ.
My recipe uses oranges. Dried orange peel works beautifully but it's scarce and pricey. Fresh oranges have their own sweetness, and I squeeze the juice in after infusion so cut down on the sugar accordingly.


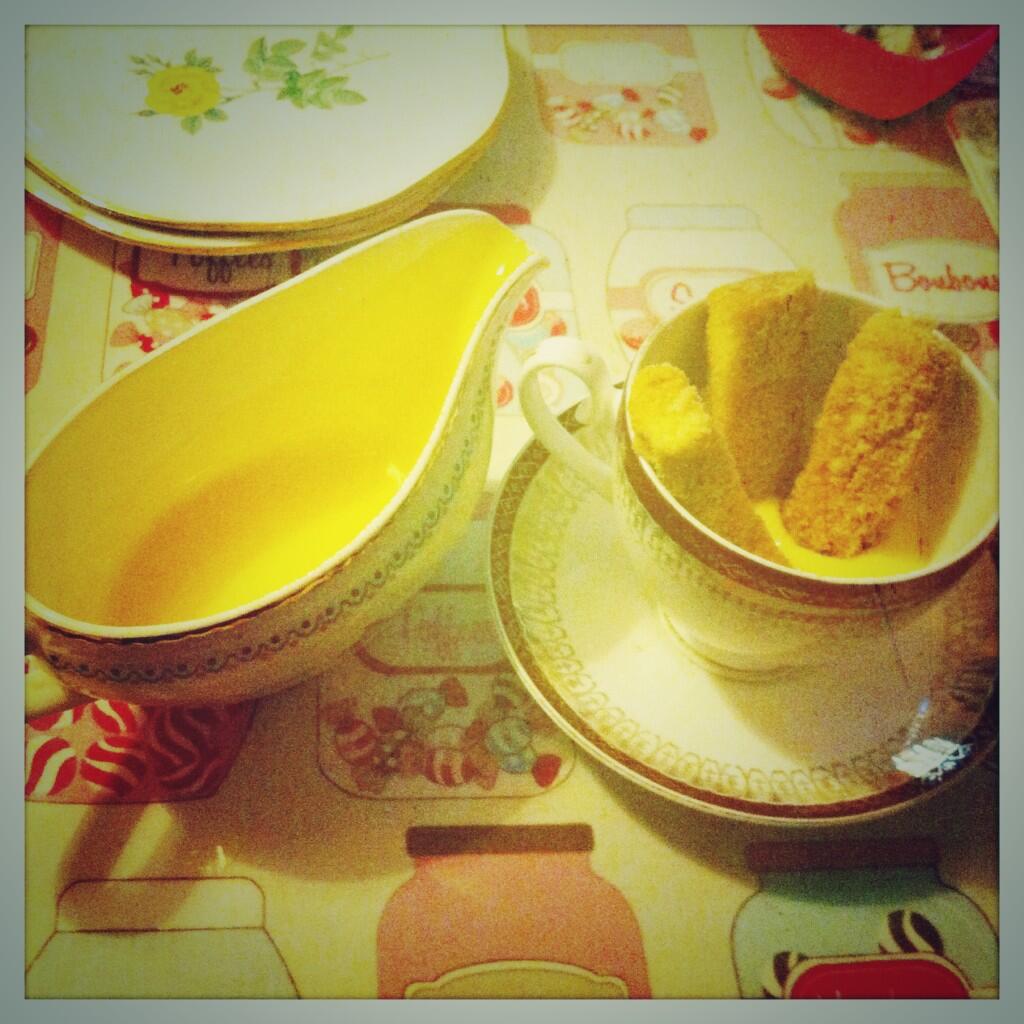
Finally, serving. The classic Danish method, and still my favourite, is to put a few port soaked almonds into the bottom of your cup, along with a good measure of the port. It adds body and you can eat the goodies afterwards. Frankly, I'd just have the port and fruit. It's really good on ice cream.

A final note about the wine: don't waste a good bottle.  This is all about the spices. For a big batch I recently made I used wine from Aldi (£2.59) and Lidl (£2.99).

Gløgg recipe (serves 4-6)

1 bottle red wine (cheap is fine)
75g sugar
1 orange, quartered
16 cloves (you can stud them into the orange if you like)
1 star anise
2-3 small cinnamon sticks or 1 large
Green cardamom pods, about 10
A handful of raisins
A handful of whole almonds
Port

Put the wine, orange, spices and sugar into the pan and heat on a medium heat, stirring until the sugar is dissolved. Make sure it doesn't boil. Keep on the heat for about 15 minutes, then switch off hob and leave for at least an hour.

Meanwhile soak some raisins and whole almonds in port. Use as much port as you like!

When the spices and orange have infused, either remove with a slotted spoon or ladle through a sieve. Squeeze in the orange juice. Reheat the wine on a medium heat. Spoon some of the almonds and raisins into your cups with a good measure of port, ladle the wine in. Serve with a teaspoon.

Skål!


Monday, 9 February 2015

Recipe: Gluten-free chocolate cherry cake

I get asked for recipes all the time so here's my Valentine's gift to you. This is a rich, fudgy chocolate cake made with non gluten containing ingredients (NGCI) that ticks all the boxes: it's rich and fudgy without being cloying, covered in ganache and tasty as you like.

I developed this for Valentine's day last year, using my favourite chocolate cake recipe as a base and working from there. Enjoy it.


Gluten Free chocolate cherry cake

200g 70-85% chocolate
200g butter
1 tbsp coffee powder dissolved in 125ml cold water or 130ml espresso
85g self-raising gluten-free flour
85g plain gluten-free flour
1/2 rounded tsp Xanthan gum
1/4 tsp bicarbonate of soda
200g light muscovado sugar
200g golden caster sugar
25g cocoa powder
3 large eggs
75ml buttermilk (or mix 50g natural yoghurt with 25ml milk)
Good quality cherry jam (sour cherry if you can find it)

For the ganache

200g dark chocolate, as above
300ml carton double cream
2tbsp caster sugar

Preset oven to 170c/150c fan/gas mark 3
Grease two 20cm/7" sandwich tins and line the bases


To bake the cake, chop up the chocolate and add to a pan with the butter and coffee. Melt slowly over a low heat, stirring occasionally. As soon as it has melted, take it off the heat.

Meanwhile mix the flours, bicarb, Xanthan gum and sugars in a large bowl. In a separate bowl or measuring jug, beat the eggs with the buttermilk/yoghurt.

Pour chocolate and egg mixtures into the dry ingredients and stir well with a wooden spoon.

When combined, divide evenly between the two baking tins. Bake for 35 -40 minutes or until a cocktail stick comes out clean. The cake will be sticky but not wet.

Leave to cool in the tin for 10 minutes then turn out onto cooling trays.

When the cake has cooled, make the ganache.

Finely chop the chocolate and put in a large bowl. Put the cream and sugar in a small pan and heat until it almost comes to the bowl. Remove from heat and pour over the chocolate. Stir the mixture until smooth and shiny.

Liberally spread the jam (I use over half a jar) on top of the bottom layer of cake and sandwich the other on top. Pour the ganache slowly over the cake, letting it run over the side. if you want, you can smooth it with a palette knife.

Leave to cool. Eat. 

Variations:

Instead of an iced cake, sandwich the cakes with fresh whipped cream and fresh fruit (I still think cherries go best with a dark chocolate) and dust with icing sugar.

If you want all chocolate then use ganache or nutella instead of jam for the sandwich.


Wednesday, 19 March 2014

Recipe - traditional tea loaf

In the increasingly fancy world of baking,  I'm sometimes guilty of forgetting the basics, the cakes that made me love to bake from a young age.

This is always popular in the cafe, so many people comment on it, so I'm sharing my recipe which was, of course, passed down from my mum.

Tea loaf is the first cake I learned to bake and I've been making them regularly since. Soaking the fruit in tea makes it moist and plumptious. It's open to endless adaptation, freezes well and is even dairy free. Unless you slather it in butter, which I highly recommend.

Dairy free


Not dairy free
I promise you this recipe will not fail, it's that good. Soak the fruit in the evening and the next day you'll have a cake in the oven within 15 minutes.

Ingredients

340g mixed fruit
100g glace cherries (optional)
220g dark brown sugar
240ml cold strong tea

1 egg
260g self-raising flour

Soak the fruit and sugar overnight in a large bowl. Stir well.

The next day, preheat the oven to 150°c and line a 2lb loaf tin.

Stir in the egg and flour, tip into tin, bake for about 90 minutes and bingo, a moist, tasty cake.

Serve cold, with or without butter, with a lovely cup of tea.


Sunday, 24 November 2013

Recipe: Squash and garlic soup with a kick

This week's bounty from The Village Wholefood Store was three crown prince squashes and a couple of lovely heads of organic garlic. I've never used this squash before, with its grey green skin, but cutting it open revealed the familiar sweet orange flesh which compliments so many herbs and spices.

Winter is here and a mild kick of chilli and ginger makes me feel energised and warm and full of life. You may, of course, add more if you have hotter tastes and aren't cooking for my cafe.


Soup of the week at the cafe!

Three crown prince squashes
2-3 heads garlic
Olive oil
2 onions, finely chopped
Fresh ginger according to taste, grated
Dried chilli flakes, according to taste
2 vegetable stock pots or cubes in about a litre of stock

First chop the squash into quarters and scoop out the seeds. Lay out onto two baking trays along with the cloves of garlic. No need to peel them, once roasted they will just squeeze out. Drizzle with olive oil, season with salt, pepper and chili flakes. Roast at 160 degrees for 40-50 minutes. Scoop out the flesh and put aside with the garlic.

Finely chop the onions and grate the ginger. Fry them on a medium heat in a large pot until soft then add the squash, garlic and stock. Bring to the boil, then turn down the heat, cover and simmer for 20 minutes. Taste after a few minutes and add chilli and seasoning as needed.

Liquidise the soup until smooth. If it's too thick, add a little water or stock. Serve with a swirl of chilli oil or a sprinkle of chilli if you want to heat it up, a dollop of natural yoghurt if you want to cool it down, and the bread of your choice.

Seasonal, local and sweet with a warming kick, this soup is all kinds of good.


Fish fingers and custard for non-cooks

This is a timey wimey blog, coming to you from the past, when it would have been useful, and brought to you exactly 48 hours too late.

Yesterday at my little cafe we celebrated Doctor Who Day. As part of that I made fish fingers and custard, the only snack the newly-regenerated 11th doctor wanted after eschewing apples and even - in a controversial move - bacon.


I thought I would share the "recipe" here so next time there's a day when everyone goes a bit mad over Doctor Who, and goes to the cinema at 7.30am in Australia, and screams in public at the sight of Peter Capaldi and even Ron Burgundy is involved... then you can make them.

This is a completely store-bought, no cook process which basically involves cutting things up and sticking them together. Like on Blue Peter.


"Fish fingers" and custard
Makes 12-16 depending on size of cake used.


Photo: Clare Leybourne


1 pre-made Madeira cake - I used this because it's firm and won't crumble but you can use any cake.
1/2 jar lemon curd
1/2 packet digestive biscuits
Custard

Crumble the biscuits in a food processor or blender or place in a plastic bag and bash repeatedly with a rolling pin until finely crumbed.

Cut the Madeira cakes into fish finger-shaped slabs. Cover in the lemon curd with a knife then dip into the biscuit crumbs. Gently press the crumbs onto the cakes, dip again and shake off the excess. Put on a baking tray to dry off.

Serve with custard. Job done. With the Madeira cake and lemon curd they actually taste wonderful and we're still munching on them today.

My friend took some home and made them beautiful, so I used her picture.

A proper, grown up recipe will be here shortly!

Friday, 15 November 2013

Tomato soup the good way

Well hello again, it's been ages. How have you been? You look great.

A few weeks ago I unexpectedly opened a cafe. I'm busier that I've ever been in my life, which has meant that recreational baking has gone out of the window for a while, as has blogging.

What I have to share today isn't baking at all, it's soup.

When I can I get my vegetables from a lovely little whole food store local to my cafe. Because much of their veg is grown right next door in Forty Hall Farm, you never now what you might get. And because of that, each week's soup is a seasonal surprise.This week's haul was a glut of cherry tomatoes, very ripe and calling out to be roasted.

The following soup, for which I looked at several recipes before more or less making it up, is what happened.


Roasted cherry tomato and red onion soup with basil.

Approx 1.25kg cherry tomatoes
3 large red onions
3 cloves garlic
tsp red wine vinegar (I used red wine instead)
tsp brown sugar
Olive oil
250ml vegetable stock
Fresh basil

Slice two of the red onions thinly and put in a roasting tray with the tomatoes and garlic. Drizzle with olive oil and roast at around 200 degrees for half an hour.

Heat up a couple of teaspoons of olive oil in a large pan. Add onions and cook over a medium heat for around five minutes, until the onion is soft. Stir in the sugar and wine/vinegar and cook for another minute or so, stirring constantly. Add the stock to the pan and stir in well.

Meanwhile, liquidize the tomatoes, onions and garlic along with all the juices. Add this to the pan along with some chopped fresh basil and reheat. Season to taste.

This tastes great with a handful of chopped fresh basil on the top. Alternatively parmesan goes very well. Like all soups, you can basically do what you like with this recipe. If you don't like the bits of onion, puree it up with the tomatoes. Add any other veg you have around. Or coriander instead of basil. Leave the stock out and use it as a pasta sauce. The world is your bouillabaisse.

Next week will be slightly more seasonal as I've been promised some squash. Watch this space


Wednesday, 31 July 2013

Recipe time! Gluten-free brownies

Photo: Oli Sandler 

Some recipes I spend ages adapting and improving, or just making up from scratch. A finished product can take five or six test bakes, pages of notes and lots of tastings by friends and family until I'm happy with the result. Even recipes I've made for years sometimes get changed too - a little less ginger, a little more salt, a darker chocolate.

And some recipes come at me fully formed straight from the internet, perfect at first bake. This is one such recipe.

It's here for two reasons: firstly because I get asked for recipes a lot. When I make something that people come back for, that I feel is unique to me, I'm reluctant to give up the recipe. After all, this is my business, and giving away my best work for people to make themselves might be a little too generous. So occasionally I like to share the recipes I use and love but for which I cannot claim credit.

Secondly, I did a craft fair last week with lots of helpful and enthusiastic brownies (the girl kind, not the cake kind) and one of them, Paige, asked me for the recipe. I hope this gets passed on to her with an apology that I didn't get a chance to write it down for her there.

This recipe comes from Doves Farm and it is a great first-time gluten-free bake. The relatively small amount of flour in a brownie means there's no crumbling and no need for Xanthan gum. It both keeps and freezes well, although I'd advise not cutting it up until you're about to eat it. I love many different brownies but this is my last-minute go-to recipe.


Gluten-free brownies

Ingredients
100 g Butter
150 g Dark Chocolate
100 g Gluten Free Plain Flour
100 g Chopped Hazelnuts or Walnuts(optional)
200 g Sugar
3 Eggs
1 tsp Baking Powder


Method
Gently melt together the butter and chocolate.
In a separate bowl mix together the flour, baking powder and sugar.
Beat in the eggs followed by the melted butter and chocolate mixture.
Stir in the nuts if used.
Pour into 150 x 200mm/6"x8" oiled and lined baking dish.
Bake in a pre-heated oven for 35/40 minutes..
Cut into slices before serving.

See? Considerably easier than pie. Happy brownie making!


Thursday, 21 March 2013

It's Easter...

Well, almost. So let's talk about Simnel cake.

Simnel cake, for those who might not know, is a spicy, pale fruit cake with a layer of marzipan baked into the middle and a layer on top, which is then grilled or gone over with a blowtorch. There are traditionally eleven marzipan balls on top, said to represent Jesus' disciples minus Judas. Being godless and geeky, I like to think it's one to represent each Doctor.

A Simnel cake looks like this (comedy chick in clothes optional):


Doing some research I found out a couple of things that surprised me. Simnel cake, while now associated with Easter, used to be eaten halfway through Lent - on Mother's Day, in fact, also called Refreshment Sunday. Perhaps a little break in the middle of Lent, more likely named after the point when Lent was not so much for fasting as for simply giving one thing up.

As with most traditions, the explanations vary but we do know that Simnel cake has been known of since Mediaeval times, and that the 11 marzipan balls were introduced, like so many traditions, by the Victorians.Whatever its history, though, Simnel cake is tasty. Rich and sweet, it deserves to be eaten when you're really hungry. Perfect with an afternoon cuppa, it's a lovely cake to put on the table when family and friends gather.

You can buy Simnel cakes in most independent bakeries (and please use independent bakeries when you can - the quality is always better) or, of course from Karen's Kitchen.


But it's also a rewarding cake to make. Tip everything in, give it a stir, cut out your marzipan and you're ready to go. If you fancy giving it a go, this is the recipe I favour, from the wonderful Mary Berry (and I don't wash the glace cherries!)


Here's my simplified version:

100g glacé cherries
225g butter, softened
225g light muscovado suga
r
4 large eggs
225g self-raising flour
375g mixed dried fruit
lemons, grated zest only
2 tsp ground mixed spice

450g/1lb marzipan
1-2 tbsp apricot jam, warmed

1. Preheat the oven to 150C/280F/Gas 2. Grease and line a 20cm/8in cake tin.

2. Cut the cherries into quarters and place in a bowl with all the other ingredients except the marzipan and jam. Beat well until thoroughly mixed. Pour half the mixture into the prepared tin.
3. Take one-third of the marzipan and roll it out to a circle the size of the tin and then place on top of the cake mixture. Spoon the remaining cake mixture on top and level the surface.
4. Bake in the pre-heated oven for about 2½ hours, or until well risen, evenly brown and firm to the touch. Cover with aluminium foil after one hour if the top is browning too quickly. Leave to cool in the tin for 10 minutes then turn out, peel off the parchment and finish cooling on a wire rack.
5. When the cake is cool, brush the top with a little warmed apricot jam and roll out half the remaining marzipan to fit the top. Press firmly on the top. Form the remaining marzipan into 11 balls.
6. Brush the marzipan with beaten egg and arrange the marzipan balls around the edge of the cake. Brush the tops of the balls with beaten egg and then carefully place the cake under a hot grill until the top is lightly toasted.

Give it a go, impress your loved ones. I promise you won't be disappointed.